Drilling into pristine bathroom tiles is daunting.
You're looking at a surface that represents months of planning and careful installation. One miscalculation, one moment of impatience, and a crack spiders across the surface—a permanent reminder that precision matters.
But there's no need to fear. When you understand how to approach this task with the proper technique and tools, drilling shifts from risk to craft.
Inside this Article:
Why Do Tiles Crack When You Drill Into Them?
Tiles crack due to fundamental material properties that you need to respect.
Ceramic, porcelain, and natural stone tiles are brittle materials. Unlike wood or metal, which can absorb and distribute stress, tiles fracture under concentrated pressure. When your drill bit contacts the glazed surface, it creates intense localised stress.
If that stress exceeds the tile's tensile strength, cracks propagate outward from the point of contact.
Then there's heat, which only compounds the problem.
As the drill bit rotates against the tile's hard surface, friction generates temperatures that can weaken the material's internal structure. The glaze—that smooth layer that gives tiles their lustre—becomes particularly susceptible to thermal shock.
Different tiles have different characteristics, too.
Ceramic tiles are softer and more porous, so they forgive minor technical imperfections. Porcelain tiles are dense and nearly impervious to water, demanding diamond-tipped bits and unwavering patience. Natural stone—marble, granite, slate—carries inherent weaknesses along its grain structure, invisible fissures that make each tile unique in its fragility.
The lesson here is simple: you don't conquer these materials through force. You work with their nature, honouring their strengths and accommodating their limitations.
What Tools Do You Need to Drill Through Tile?

Quality tools don't guarantee success, but poor tools ensure failure. Here's what you'll need:
Drill Bits
Standard twist bits designed for wood or metal will skip uselessly across glazed surfaces before overheating and dulling.
For ceramic tiles, carbide-tipped masonry bits provide adequate penetration, though they require careful cooling. For porcelain and natural stone, only diamond-tipped bits possess sufficient hardness to cut cleanly through these dense materials.
Diamond bits come in two varieties: water-cooled and wax-filled. Water-cooled bits last longer and cut more efficiently, whilst wax-filled varieties offer convenience when water application proves impractical. The distinction matters less than your commitment to keeping the bit cool—overheating damages both the bit and the tile.
The Drill Itself
Your drill must offer variable-speed control. High speeds generate excessive heat and vibration—both enemies of intact tiles.
Critical: Ensure the hammer or percussion function remains disabled. Hammer action—so useful for concrete—transmits shock waves through tiles, almost guaranteeing cracking. Rotary mode only, always.
Supporting Tools
Painter's tape or masking tape prevents the bit from skittering across the glossy surface during initial contact.
A spray bottle filled with clean water provides cooling. A digital wall scanner detects hidden pipes and electrical cables behind tiles—a critical safety measure in bathrooms where utilities run through walls.
Quality wall anchors matched to your tile thickness ensure stable mounting once holes are complete.
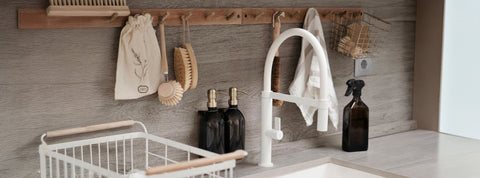
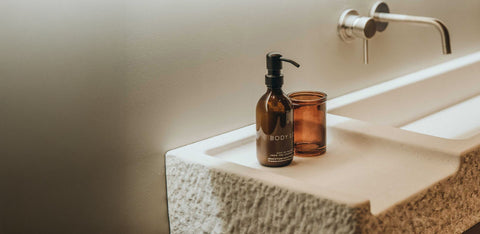
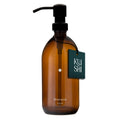
At Kuishi, we design products knowing they'll be installed with care. The same attention you give to selecting a soap dispenser or towel holder should extend to the installation process itself. Quality tools honour quality fixtures.
How to Actually Drill into Your Bathroom Tiles Without Cracking Them

With your tools assembled and understanding established, here's the practical technique:
Step One: Precise Marking
Measure twice, mark once, then verify again. Once you've made a hole, there's no going back—you have one shot to get it right.
Once you're sure of placement, apply masking tape over the mark. This tape prevents the bit from slipping during initial contact, absorbs minor vibrations, and reduces glaze chipping at the hole's perimeter.
Step Two: Check For Hidden Obstacles
Run a wall scanner across the drilling area to detect pipes, electrical cables, or mounting studs behind the tile. In bathrooms, plumbing often runs through tiled walls at heights convenient for fixtures—precisely where you intend to drill.
What takes two minutes to verify can prevent catastrophic and costly damage.
Step Three: Initial Positioning
Position your drill perpendicular to the tile surface, but begin at a slight angle—about fifteen degrees. Press the trigger gently whilst applying minimal pressure. The angled approach gives the bit initial purchase on the slick surface.
Once you've created a small indentation, gradually straighten the drill until it's at a perfect 90-degree angle to the tile.
Step Four: The Drilling Process
Patience is essential here.
Maintain low speed—around 400 to 600 RPM if your drill displays such precision. Apply steady, light pressure. You should feel as though you're guiding rather than forcing. The bit must work its way through the glaze, not batter through it.
This initial penetration through the hard glazed surface represents the most delicate phase. Rush it, and you crack the tile. Honour it with patience, and you succeed.
Keep everything cool. Every ten to fifteen seconds, pause to spray water onto both the drill bit and the surrounding tile surface. Water serves as both coolant and lubricant, dramatically reducing friction and preventing thermal damage.
You'll feel a subtle shift when the bit breaks through the glaze into the tile's softer body. Resistance decreases slightly. You may now increase speed modestly whilst maintaining consistent pressure. Continue with water cooling until you penetrate entirely through the tile.
Step Five: Finishing Up
Once through the tile, stop.
Switch to an appropriate masonry or wood bit for the substrate behind—drywall, cement board, or plaster, depending on your wall construction. Using the same diamond bit for substrate drilling dulls it unnecessarily and provides no benefit.
Drill to the depth required for your wall anchor—typically thirty to forty millimetres beyond the tile. Insert the anchor carefully, ensuring it sits flush with the tile surface or slightly recessed.
When mounting your fixture, tighten screws firmly but never forcefully. Over-tightening can crack tiles just as surely as improper drilling.
Common Drilling Mistakes and How to Avoid Them
 These are the most frequent errors that compromise tiles, and how to avoid them:
Impatience with speed and pressure: High drill speeds generate heat and vibration. Excessive pressure concentrates stress. Together, these create perfect conditions for cracks. If drilling feels like a battle between you and the material, you're doing it wrong. Slow down.
Using inadequate equipment: Standard drill bits simply cannot perform this task, regardless of your technique. Diamond-tipped bits for porcelain and stone, carbide-tipped for ceramic—these are non-negotiable. Similarly, neglecting water cooling because it seems inconvenient trades minor effort for major risk.
Failing to check for hidden utilities: Drilling into a water pipe or electrical cable transforms a simple installation into an emergency. Wall scanners are inexpensive and readily available. In bathrooms where plumbing runs behind tiles, this two-minute precaution prevents catastrophic damage.
Drilling too close to edges or grout lines: Tile edges represent structural weak points where cracks propagate easily. Maintain at least twenty millimetres distance from any edge. If you must drill near a corner, consider whether the grout line itself might serve as an alternative location—drilling through grout requires less precision, and any error remains easy to repair.
Final Thoughts
Drilling through tiles without damage isn't just about technique—it's about understanding materials, respecting their properties, and moving with awareness.
At Kuishi, we design products to serve faithfully for years, crafted from materials selected for both their beauty and their integrity. When you install a Kuishi soap dispenser or towel holder, you're placing an object of intention into a space you've crafted with care.
The installation itself deserves the same consideration—not as an afterthought, but as an extension of conscious living.
Discover fixtures designed to honour the care you invest in your space. Explore the Kuishi collection at kuishi.com.
A Gift for Our Community
As our thanks for engaging with this guide, enjoy 15% off any Kuishi wall-mounted holders. Use code TILEGUIDE at checkout.